Introduction
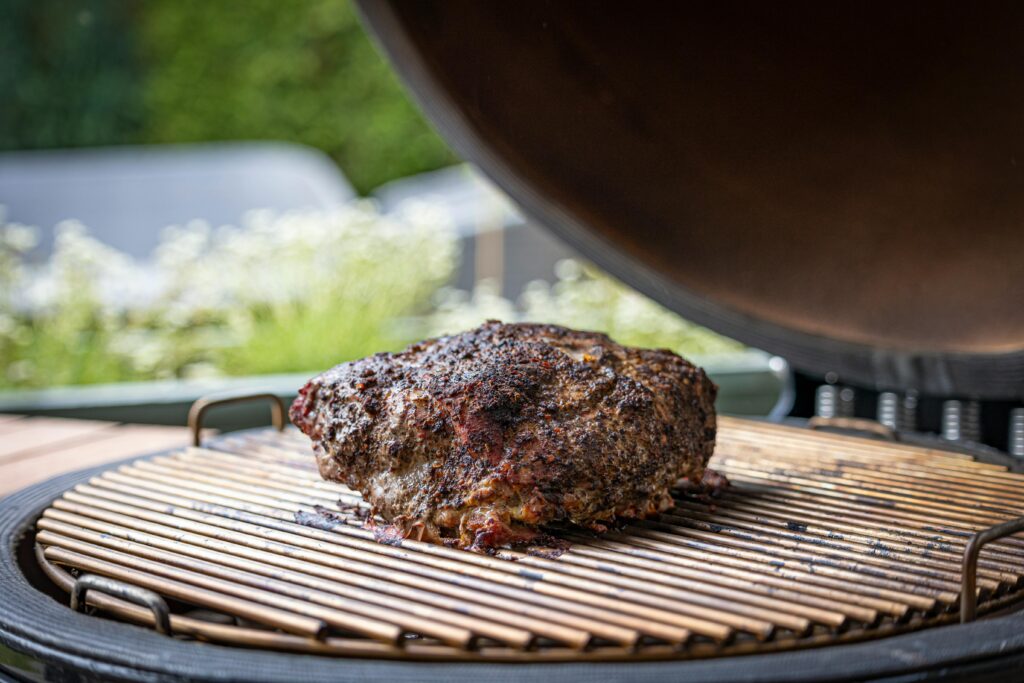
The first time I cut into a brisket, I saw that beautiful pink smoke ring beneath the crust. I was absolutely over the moon. Years ago, when I was a newbie pitmaster, I struggled to get that coveted pink halo on my barbecue. That thin pink edge on slow-smoked meat is called a smoke ring. It’s like a badge of honor in the BBQ world. But what exactly is it, and why does it matter?

Look at those brisket slices – see that rosy pink layer just under the dark bark? That’s the smoke ring. It’s formed by a chemical reaction during the smoking process. To us pitmasters, it’s a sign of a job well done. Interestingly, the smoke ring doesn’t really add flavor to the meat—it’s purely visual. But it does tell everyone that you know your way around a smoker. And let’s be honest, it makes your barbecue look downright irresistible when you slice and serve it.
Science Behind the Smoke Ring
Alright, time for a bit of BBQ science. Burning wood or charcoal gives off gases like nitric oxide (NO) and carbon monoxide (CO). When those gases mix with the moisture on the meat’s surface, they bind with myoglobin. Myoglobin is the protein that gives meat its red color when raw. This chemical bond keeps the meat from fully turning brown on the outer layer. So instead of cooking gray all the way through, the outside stays pink and you get that smoke ring.
This only happens while the meat is still below a certain temperature. Many believe that once the meat’s internal temperature passes roughly 140°F, the smoke ring stops developing. At that point, the myoglobin has cooked enough that it can’t retain the pink color. In short: burning wood releases gases that react with the meat to create that pink ring.
Now that we know the science, let’s talk about the practical side – how to actually achieve it.
Essential Factors for a Perfect Smoke Ring
There are several key factors that influence whether you’ll get that picture-perfect pink ring. Let’s break down the essentials:
- Wood Choice and Smoke Quality: The type of fuel you use matters big time. Burning real hardwood (logs, chunks, or quality charcoal) produces the gases we need for a smoke ring. If you use a propane or electric smoker, be sure to add wood chips or chunks. Otherwise, you won’t get the real smoke needed for a ring. Aim for a clean, thin blue smoke, not billowing white clouds. Clean smoke carries those helpful gases without choking your meat in soot.
- Proper Meat Selection: The meat itself plays a role. You’ll see the most dramatic smoke rings on red meats like beef brisket, beef ribs, or pork shoulder. These cuts have lots of myoglobin, which helps them turn that nice pink. Poultry can get a smaller ring, but it won’t be as vivid. Start with fresh, unprocessed meat (avoid anything pre-cured or injected with solutions) for the best canvas. Also, trim down thick fat caps. Smoke can’t penetrate through a heavy layer of fat, and fat won’t turn pink anyway.
- Temperature Control: Low and slow is the classic approach for a reason. Keeping your smoker around 225–250°F, especially for the first few hours, gives the meat time to soak up smoke. This way, the inside of the meat doesn’t get too hot too quickly. If you blast the heat too high too fast, you might skip the smoke ring phase entirely. The exterior will heat up so quickly that the ring doesn’t have a chance to form. So aim for a steady, controlled temperature. Consistency is key. Wild fluctuations can mess up both the ring and your meat’s texture.
- Humidity and Moisture: Smoke loves moisture. A damp surface on the meat helps those smoke gases dissolve and work their pink magic. Many pitmasters use a water pan in the smoker to keep the environment humid. You can also spritz the meat with water or apple juice occasionally to keep it moist. Just don’t overdo it. Wait until a crust (bark) has formed before spritzing, or you might wash off your rub. Keeping the cook chamber a bit humid prevents the meat surface from drying out. Otherwise, a dry “skin” can create a barrier that smoke can’t penetrate.
- Airflow and Oxygen: Your fire needs to breathe. Good airflow in your smoker helps the wood burn in that sweet spot. If you choke off oxygen, the fire will smolder and produce thick, dirty smoke. That kind of smoke has fewer of the beneficial gases and more bitter particles. Keep your vents open enough to maintain a small, steady fire with thin smoke. Proper oxygen levels ensure you get the right kind of smoke to form a ring. It also helps keep your cooking temperature stable.

Step-by-Step Guide to Achieving a Smoke Ring
Ready to put it all together? Here’s a step-by-step game plan to maximize that smoke ring on your next BBQ cook:
- Prepping the Meat: Start by trimming off any excessive fat. Leave about a 1/4-inch fat cap at most, so smoke can reach the meat. Pat the meat dry, then apply your favorite rub or seasoning evenly. A thin layer of mustard as a binder can help the rub stick. Don’t worry, you won’t taste the mustard. It’s just there to hold the spices on. Now you have a nicely prepped piece of meat ready for the smoker. Tip: You can put the meat on the smoker straight from the fridge. Starting it cold gives you a bit more time for the ring to develop before the inside heats up.
- Controlling the Fire and Smoke: Get your smoker fired up early. Use charcoal or wood as the fuel and let it come up to your target temperature. When the coals are hot and you see a thin blue smoke, you’re ready to cook. Place the meat in the smoker (make sure smoke can circulate around it) and close the lid quickly. During the cook, add wood chunks or charcoal as needed to keep the smoke steady. Remember to adjust your air vents to keep the fire burning clean and not too hot.
- Monitoring Temperature: Don’t just guess – use a thermometer to keep an eye on things. Track your smoker’s temp with a reliable gauge. Built-in thermometers can be off. Consider using a separate grill thermometer or probe for accuracy. Aim to maintain that low-and-slow sweet spot around 225°F. Avoid opening the lid too often, since heat loss can cause swings. Keep an eye on the meat’s internal temperature as well to track progress. Remember, after the internal temp gets above the smoke-ring range (~140°F), the ring stops growing. Consistent heat and a watchful eye will help you turn out a perfectly cooked barbecue with a beautiful ring.
- Adding Moisture When Needed: Keep things moist during the cook. If your smoker has a water pan, use it. Fill it with hot water at the start so it doesn’t cool your chamber. This adds humidity that helps with the smoke ring and also keeps the meat juicy. As the cook goes on, check the meat every hour or so. If the surface looks dry, give it a light spritz. You can use plain water, apple juice, or a mix of apple juice and vinegar. Don’t overdo the spritzing. Never spray so much that you cool the fire down. A few quick sprays to keep the surface damp is all you need. By maintaining moisture, you create an environment where smoke can keep penetrating the meat for longer.
Common Mistakes to Avoid
Even experienced pitmasters mess up sometimes. Here are a few common mistakes to watch out for when chasing that perfect smoke ring:
- Over-smoking or Under-smoking: Balance is key. Too much smoke can make your meat bitter, and it doesn’t really improve the smoke ring. You want to avoid thick, billowing smoke at all costs. At the same time, you don’t want to skimp on smoke. If you don’t use enough wood or cut the smoking time short, you might end up with no ring. And you’ll miss out on smoky flavor too. Don’t go overboard adding wood, but also don’t be too stingy. Aim for a steady, moderate flow of smoke during the first few hours. That gives the meat time to develop a ring without getting overpowered or under-smoked.
- Temperature Fluctuations: Big swings in cooking temp can hurt your results. If your smoker runs hot then cools down repeatedly, it can mess things up. The smoke ring might not form well, and your meat can cook unevenly. These fluctuations often happen if you’re opening the lid too much or letting the fire die down. Try to dial in a stable temperature and keep it there. Avoid the urge to peek repeatedly, and make small vent adjustments rather than large ones. Consistency in temperature will yield better BBQ and a nicer ring.
- Using the Wrong Wood: Not all wood is good for smoking. Avoid softwoods like pine or cedar. They produce nasty-tasting resin and the wrong kind of smoke for barbecue. Treated or painted wood is absolutely off-limits (for safety and flavor reasons). Stick with proven hardwoods for BBQ: oak, hickory, apple, cherry, pecan. Mesquite is fine too, but it’s very potent, so use it sparingly. Also, make sure your wood is properly seasoned (dry). Wet or green wood will give you thick, dirty smoke and poor flavor. Using quality wood gives you cleaner smoke, better flavor, and a nice ring as a bonus.
Final Thoughts
Achieving the perfect smoke ring is a fun challenge for any BBQ enthusiast. Don’t be discouraged if you don’t nail it on your first try. Barbecuing is all about learning and tweaking. Even after years of smoking meat, I still get excited when I see that pink ribbon beneath the bark. It never gets old.
Remember, the ultimate goal is delicious, tender meat. A smoke ring is just the cherry on top. If your barbecue tastes amazing, you’ve already won, ring or no ring. That said, keep experimenting with your technique. Maybe try a different wood next time, or tweak your spritzing schedule, and see how it affects the ring. Change only one thing at a time, so you know what made the difference.
Most importantly, enjoy the process. Every cook is an opportunity to learn and bond with your smoker. So grab a cold one, invite some friends or family over, and have fun with it. With patience and practice, you’ll be slicing into your next brisket or rack of ribs with confidence. Soon enough, you’ll see that beautiful pink BBQ halo smiling back at you. Happy smoking!
Grilling can be dangerous. Information provided is for educational purposes only. Always follow proper grilling and food safety guidelines when handling and cooking meat. Use a meat thermometer to ensure safe internal temperatures, wash hands and surfaces thoroughly, and avoid cross-contamination. Information is for educational purposes only
Some posts may contain affiliate links. If you purchase through these links, we may earn a small commission at no cost to you.